
What's inside
As an Amazon Associate I earn from qualifying purchases. This post may contain affiliate links at no extra cost to you.
To cut a circle with a table saw safely, use a rigid pivot jig that guides the workpiece around a fixed point; never try to steer a circle freehand against the blade.
When a table saw is the right tool
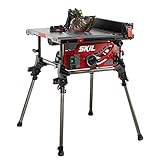
A table saw can produce accurate discs, rings, and large round panels when the workpiece is too large for a router compass or you already have a stable saw setup. It is especially useful for circles between about 12 and 36 inches in diameter, provided the saw has enough table and outfeed space.
As an Amazon Associate we earn from qualifying purchases at no extra cost to you.



The trade-off is that a table saw cuts the circle progressively rather than in one pass. The blade leaves a kerf on the underside and may require light sanding around the edge. A router is usually better when you need a cleaner finished edge, a recess, a sign blank, or several identical circles.
The practical circle-cutting jig
The safest general-purpose design is a plywood platform that rides in the table saw’s miter slot. A pivot screw on the platform locates the center of the circle, while the workpiece rotates around it as the blade removes material.
| Jig part | Recommended specification | Reason |
|---|---|---|
| Base | 3/4-inch Baltic birch plywood, 12 x 36 inches | Stays flatter and resists splitting |
| Miter runners | Two hardwood or phenolic runners, approximately 3/8 x 3/4 x 30 inches | Supports the jig on both sides of the blade |
| Pivot screw | 1/4-inch or 6 mm machine screw, washer, and wing nut | Strong enough for plywood and solid wood blanks |
| Pivot adjustment | 3-inch-long slot centered along the blade path | Allows different circle diameters without rebuilding the jig |
| Workpiece capacity | Up to roughly 36-inch diameter on a 36-inch platform | Limited by table, platform, and outfeed clearance |
Use straight-grained hardwood for the runners if you are building economically, but phenolic or UHMW plastic runners hold their dimensions better in changing humidity. The base should be flat, free of twists, and large enough to support the workpiece before and after it passes the blade.
How to size the pivot
Measure from the pivot center to the side of the blade tooth that will define the finished edge. This distance equals the desired radius. For a 24-inch circle, the target radius is 12 inches. If the jig’s pivot hole is positioned 12 inches from the cutting tooth, the blade will cut approximately a 24-inch diameter circle.
Make a test cut in scrap because the exact result depends on which side of the blade you reference and how the workpiece is attached. Mark the intended center on the underside of the blank, drill a snug pivot hole, and use a washer broad enough to prevent the screw head from pulling through.
Build and set up the jig
-
Cut the plywood base to approximately 12 x 36 inches, or enlarge it if your saw has generous support surfaces. Round or chamfer the leading corners so they cannot catch on the saw table.
-
Install the two runners in the miter slots. Leave a slight amount of clearance so the jig slides without side-to-side play. Attach the runners from underneath with screws countersunk below the surface; apply glue only if you can keep it out of the slots.
-
Mark the blade path on the base and cut a narrow pivot slot parallel to that path. The slot should be long enough to cover your intended radius range. Reinforce the slot’s underside with a second plywood strip if the base becomes flexible.
-
Install the pivot screw from below, with its head recessed so it cannot contact the saw table. The threaded end should project just far enough through the workpiece for a washer and wing nut.
-
With the saw unplugged, slide the jig through the blade area and check that the blade will not strike the pivot hardware, runners, or reinforcement. The pivot must remain behind the blade until the cutting operation begins.
-
Set the blade height only slightly higher than the workpiece—about 1/8 inch above the top surface. Excessive blade exposure increases the amount of exposed tooth and makes the cut harder to control.
How to cut a circle on a table saw
This procedure is for a solid, flat blank such as plywood, MDF, or properly dried hardwood. Remove loose knots, staples, screws, and bark first.
-
Draw the center and the approximate outside circle on the blank. Drill the pivot hole at the marked center. For a finished circle, place the hole in the waste area only if you plan to remove the center mark later; otherwise use a small hole on the underside and accept that it may need filling.
-
Position the blank on the jig with its edge well away from the blade. Fasten it with the pivot screw, washer, and wing nut. For a large or heavy blank, add two low-profile clamps outside the intended circle, but ensure they cannot enter the blade’s path.
-
Put on eye and hearing protection. Make sure the blade guard, riving knife, and anti-kickback devices can be used with the jig. If the jig physically prevents their use, reconsider the method or use a router instead; do not remove safety equipment casually.
-
Start the saw and slowly advance the jig until the blade makes a shallow entry cut at the marked waste edge. Keep your hands on the jig’s handles or safe surfaces, never near the rotating blank or blade.
-
Stop the saw and inspect the entry cut. Adjust the pivot position if the cut is not aligned with the desired circle. It is easier to correct the setup before cutting around the entire perimeter.
-
Restart the saw and rotate the workpiece slowly around the pivot. Maintain steady contact between the jig runners and miter slots. Make several shallow passes rather than forcing a thick cut in one rotation.
-
Complete the final pass only after confirming that the waste section is supported and cannot pinch the blade. Turn off the saw and wait for the blade to stop before removing the jig or the finished circle.
For stock thicker than about 1-1/2 inches, consider rough-cutting the blank with a jigsaw or bandsaw first, leaving 1/8 to 1/4 inch outside the final line. The table saw jig can then perform a lighter finishing cut. This reduces strain, heat, and the chance of binding.
Blade choice and cut quality
A sharp combination blade with roughly 40 to 60 teeth is a sensible choice for general plywood and hardwood. A 60-tooth finish blade can reduce splintering in veneered plywood, but it may cut more slowly and load up in thick stock. A ripping blade is faster in solid wood but usually leaves a rougher edge.
| Material | Useful blade type | Typical approach |
|---|---|---|
| 3/4-inch plywood | 40–60 tooth combination or finish blade | Use a shallow first pass and support the veneer |
| 1-inch hardwood | 40–50 tooth combination blade | Rotate steadily; do not force knots through the cut |
| MDF | 50–60 tooth carbide blade | Use dust collection and clean the blade afterward |
| Stock over 1-1/2 inches | Sharp 40-tooth blade after rough cutting | Remove most waste before the jig’s finishing pass |
Inspect the blade if the motor sounds strained, the cut burns, or the edge becomes noticeably rough. Resin and MDF dust can build up on carbide teeth; a manufacturer-approved blade cleaner and a nonmetallic brush can restore performance. Replace or sharpen a blade when cleaning no longer improves the cut.
Table saw or router: which is better?
Choose the table saw jig when the circle is large, the workpiece is heavy, or you need to use a saw you already own. It is also practical for rough circular parts that will later be covered, painted, or sanded.
Choose a plunge router with a circle-cutting jig when the edge is visible, the diameter is small to medium, or you need a groove, round-over, dado, or exact template edge. A router can make a cleaner final edge and can cut a circle from a rectangular blank without exposing as much rotating material. It also handles repeated identical circles well once the compass is set.
| Your situation | Better choice | Why |
|---|---|---|
| One large 30–36-inch plywood disc | Table saw jig | Large radius and heavy blank are easier to support |
| Visible furniture edge | Router | Cleaner edge and immediate profile options |
| Beginner with limited shop space | Router with a compact jig | Less platform storage and easier small-circle setup |
| Many identical circles | Either, usually router | Router templates and stops make repetition efficient |
| Thick rough-sawn stock | Table saw, followed by routing | Remove bulk waste first, then refine the edge |
Common mistakes to avoid
- Freehand steering: A round outline is not a safe guide. The blade can grab the workpiece or kick it back.
- Using a loose pivot: Any movement changes the radius and can twist the blank into the blade. Use a snug hole and a washer.
- Cutting too deeply: Set only enough blade height to clear the material. Multiple light passes are more controllable.
- Leaving unsupported waste: Large offcuts can bind or fall as the cut closes. Rough-cut them away first when necessary.
- Ignoring dust and pitch: Clogged teeth increase heat and resistance. Clean the blade and maintain dust extraction.
- Reaching over the blade: Switch off and wait for complete blade stoppage before clearing scraps or adjusting the jig.
For most projects, a well-built pivot jig makes cutting circles on a table saw repeatable, but it does not make the operation risk-free. Keep the cut shallow, use a sharp blade, maintain firm control of the jig, and choose a router when its enclosed, cleaner cutting action better matches the job.