
Our Top Picks


What's inside
As an Amazon Associate I earn from qualifying purchases. This post may contain affiliate links at no extra cost to you.
For two years I worked under a single bulb screwed into the garage door opener and I blamed my chisels. Tearout I could not see, glue squeeze-out I missed until it was cured, pencil lines that vanished the second I leaned over the board. It was not the tools. It was the light. Getting a workshop lighting layout right is the cheapest accuracy upgrade in a small shop, and it is the one most of us put off because it feels like an electrician’s job.
It usually is not. In a typical garage shop you are dealing with a low ceiling, a car that may still live there, walls you cannot move, and a couple of existing circuits. That set of constraints actually simplifies things. You are not designing a showroom. You are trying to kill shadows on the bench, at the saw, and inside the cabinet carcass you are assembling on the floor because there is nowhere else to put it.
As an Amazon Associate we earn from qualifying purchases at no extra cost to you.


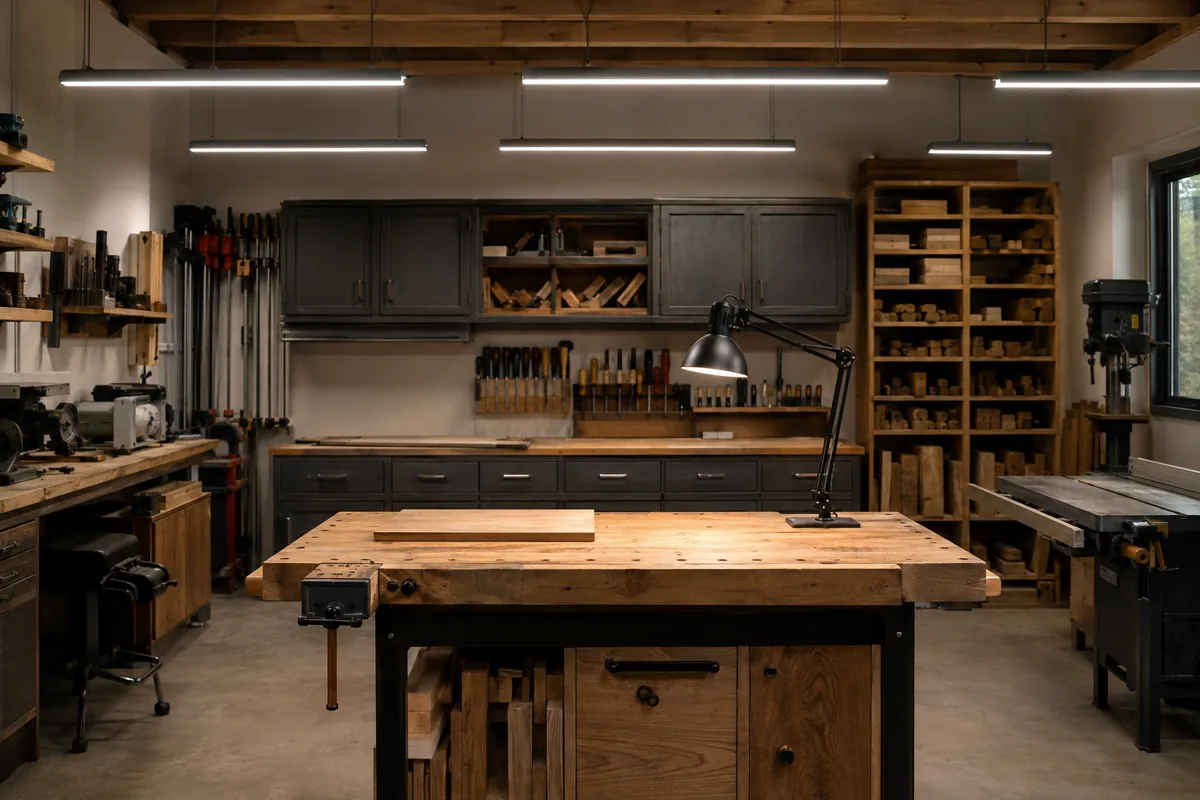
What a Good Workshop Lighting Layout Actually Has to Do
Woodworking light has three jobs, and they fight each other. You need broad ambient light so you are not walking into the jointer. You need flat, even light across horizontal surfaces so you can read a layout line. And you need raking light, meaning light that skims across the surface at a low angle, so you can see sanding scratches, plane tracks and the ridge left by a dull blade. Overhead fixtures alone give you the first two and actively hide the third.
That is the mistake I made. I flooded my shop with ceiling shop lights, congratulated myself, and then finished a walnut tabletop that looked flawless in the garage and looked like a gravel driveway in the sunlight on the driveway. Even light is not the same as revealing light. You need both, and you need to be able to switch between them.
| Zone | What it needs | Fixture type | Notes for a garage shop |
|---|---|---|---|
| Whole-shop ambient | Even coverage, no dark corners | 4 ft LED shop lights, linkable | Rows perpendicular to the long wall |
| Bench and hand-tool work | Bright plus a low-angle source | Overhead pair plus an articulating task lamp | The task lamp is the one that finds scratches |
| Table saw and miter saw | No shadow cast by your own body | Fixture ahead of and above the operator | Avoid mounting directly behind you |
| Assembly floor space | Portable, aimable | Rechargeable LED area light or tripod stand | Gets under and inside cabinets |
| Finishing area | Color-accurate, movable | High-CRI panel or handheld inspection light | Held at a low rake angle to the surface |
Lumens, Spacing and the Math I Actually Use
Skip footcandle charts for a minute. The rule of thumb I plan around for a woodworking shop is roughly 70 to 100 lumens per square foot of floor area, which lands you in the range professionals would call task-level ambient. A single-car garage bay of about 240 square feet therefore wants somewhere in the neighborhood of 17,000 to 24,000 lumens total. Common 4 ft LED shop lights land in the 4,000 to 5,500 lumen range each, so you are talking about four to six fixtures for that bay. A two-car garage roughly doubles it.
That number sounds absurd if you grew up with a 60-watt bulb, and it is genuinely more light than a living room. Woodworking is close, detailed work on surfaces that scatter light, and older eyes need considerably more of it than younger ones. If you are past forty, plan toward the upper end of that range. I have never once wished for less light in my shop.
For spacing, run your fixtures in rows perpendicular to your longest wall, spaced roughly equal to your ceiling height. With an 8 ft ceiling that means fixtures about 6 to 8 feet apart, with the outer rows about half that distance from the walls so you do not get gloom along the perimeter where your lumber rack and wall cabinets live. Two rows down a single bay usually beats one row down the center, because two offset sources fill in the shadow your own shoulders throw.
One more thing that matters more than lumen count: get the fixtures as high as your ceiling allows and spread them out. Concentrating light in one bright cluster gives you a hot spot and hard shadows everywhere else. Diffuse and distributed beats bright and centralized every time.
4 ft Linkable LED Shop Lights (Multi-Pack)
Buy these in a four or six pack and buy them all identical. Mixed brands mean mixed color temperature, and a shop lit by three different whites looks and feels wrong. Look for linkable models with included chains and plug-in cords so you can hang a whole row off one outlet, and confirm the pack includes the jumper cords rather than selling them separately. Check the stated lumens per fixture rather than the equivalent-wattage marketing number.
Color Temperature and CRI, or Why Your Finish Lies to You
Color temperature is measured in Kelvin. Warm household light sits around 2700K to 3000K, neutral is roughly 4000K, and daylight-white runs 5000K to 6500K. For a shop I want 4000K to 5000K. It reads clean and alert without the blue-white glare that gives me a headache after a few hours at 6500K. Just as important, pick one temperature and stick to it across every fixture, including your task lights.
CRI, the Color Rendering Index, is the spec most people ignore and the one that actually determines whether your stain looks the same in the shop as it does in the customer’s dining room. It runs to 100, sunlight being the reference. Cheap fixtures often sit in the low 80s, which is fine for finding your tape measure and bad for judging whether cherry and mahogany scraps are close enough to use together. Anything at 90 or above is worth paying for in your finishing area, even if the general ambient fixtures are ordinary.
I learned this by matching two boards under my shop lights, gluing them up, and discovering outdoors that one was distinctly pinker. Now I do all color matching by the open garage door in daylight and treat my high-CRI panel as the backup, not the authority.
Task Lighting, Shadows and Machine Placement
Overhead light plus your own body equals a shadow exactly where you are looking. That is unavoidable geometry, and the fix is putting light in front of you rather than adding more behind you. A few placements that changed my shop:
At the bench: an articulating arm lamp clamped to the back edge, aimed almost parallel to the benchtop. Swing it low and every scratch, every tearout ridge and every glue line throws a shadow you can see. This single lamp improved my surface prep more than any sandpaper upgrade.
At the table saw: a fixture positioned ahead of the blade and slightly to the operator’s side, so the light falls on the cut line rather than being blocked by your torso. Under-cabinet style LED strips mounted to the underside of a wall cabinet or a shelf work well here.
At the drill press and miter saw: small clamp lights or magnetic-base LEDs aimed at the point of contact. On a miter saw the shadow of the fence is the problem, so light it from the front, not from directly above.
For assembly: a rechargeable portable area light. Nothing else gets inside a carcass or under a workbench to see whether a screw actually pulled the joint tight.
Rechargeable LED Work Light with Magnetic Base
The one light I reach for daily. Magnetic base sticks to a cast iron table or a steel cabinet, and cordless means it goes inside the cabinet you are assembling. If you already own a cordless platform like DeWalt XR, Milwaukee FUEL or Makita LXT, buy the work light on that battery instead of a separate charger. Look for a model with a rotating head and at least two brightness levels, and treat single-brightness lights as a compromise.
Wiring, Mounting and the Practical Trade-Offs
Most plug-in linkable LED shop lights let you chain several fixtures off a single receptacle, which is why they are so popular for garage retrofits. Check the manufacturer’s stated maximum number of linked fixtures and respect it. Modern LED shop lights draw very little, but a garage circuit is often shared with the door opener, a freezer and whatever your dust collector is plugged into, and that is what actually trips the breaker.
If you can, get your lighting onto a circuit separate from your machines. Having the lights die the instant your table saw stalls is memorably unpleasant. I also strongly recommend one accessible master switch near the door rather than pull chains on individual fixtures, and mounting fixtures with chain or S-hooks rather than hard-screwing them flush, so you can shift a row when the shop layout inevitably changes.
- ✔ Massive accuracy and safety gain for a modest cost
- ✔ Plug-in linkable LEDs mean no electrician for most retrofits
- ✔ LED draw is low enough to add fixtures without rewiring
- ✔ Cordless task lights double as general work lights
- ✔ Fully reversible if you rent or plan to sell
- ✘ Low garage ceilings mean fixtures sit in head-strike range on a lift-up door
- ✘ Cheap fixtures often have poor CRI and inconsistent color between units
- ✘ Plug-in cords and chains look messy compared to hardwired runs
- ✘ Bare high-lumen fixtures at eye level cause real glare without diffusers
- ✘ Buying piecemeal over time almost guarantees mismatched color temperature
Frequently Asked Questions
How many shop lights do I need for a two-car garage? Using 70 to 100 lumens per square foot, a roughly 400 to 480 square foot two-car garage wants somewhere around 30,000 to 45,000 lumens. With typical 4,000 to 5,500 lumen 4 ft fixtures that is roughly eight to twelve lights, arranged in two or three rows running perpendicular to the long wall. Buy them as one matched set if you can.
Is 5000K too bright or harsh for a woodworking shop? 5000K is not about brightness, it is about color, and it is a common and sensible shop choice. Some people find it clinical after a long session. If that is you, 4000K reads slightly warmer while still being plenty crisp for layout lines. What actually causes discomfort is glare from bare high-output fixtures in your sightline, not the Kelvin number, so raise them and spread them out.
Do I need to hire an electrician for shop lighting? For plug-in linkable LED shop lights hung from hooks or chain, generally no, and that is why I recommend them for most garage shops. The moment you are adding circuits, installing new receptacles, or hardwiring fixtures into a junction box, you are into permit and code territory that varies by jurisdiction, and that is worth paying a licensed electrician to do properly.
How I Would Do It Over Again
If I were starting from a bare garage tomorrow, I would buy one matched multi-pack of 4 ft linkable LED fixtures sized to hit the upper end of that lumens-per-square-foot range, hang them in two rows on chain, and put them all on one switch by the door. Then I would spend the rest of the budget on two good task lights: an articulating lamp at the bench and one high-CRI cordless work light that goes wherever the work is. That combination costs less than a decent router and will improve your joinery more.
Do not try to perfect it on paper. Hang the ambient rows, work for a week, and notice where you keep tilting your head to find a shadow. That is where the next light goes.
Check prices on Amazon →