
Our Top Picks




What's inside
As an Amazon Associate I earn from qualifying purchases. This post may contain affiliate links at no extra cost to you.
I burned through two routers before I understood what I actually needed, and both mistakes came from the same place: I bought on price instead of on how I work. The best router kit for beginners is not the cheapest one on the shelf and it is not the 3+ horsepower monster the woodworking magazines keep photographing in a table. It is the kit that lets you round over an edge on Tuesday, cut a dado on Saturday, and still fit in a drawer in a two-car garage where the car actually parks.
Here is the real problem with router shopping. Routers are sold by motor size and base type, but beginners struggle with completely different things: bit changes that require two wrenches and a yoga pose, depth adjustments that drift mid-cut, and a base plate so small that the whole tool wants to tip off the edge of a board. None of that shows up in a spec sheet. So let me walk you through what I would tell a friend standing in the tool aisle with a gift card and no idea what to grab.
As an Amazon Associate we earn from qualifying purchases at no extra cost to you.


Router Categories At A Glance
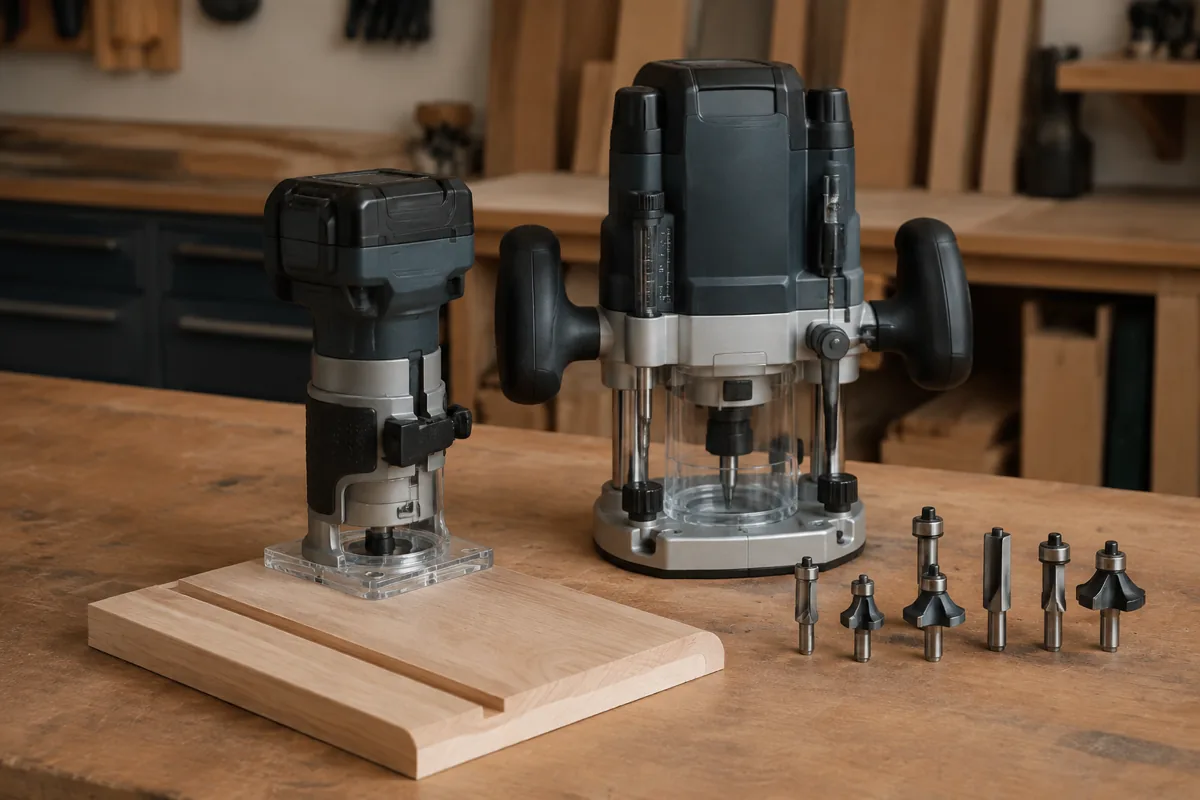
Routers land in three broad buckets. Sizes below are the common ranges you will see on US retail shelves, not exact specs for any one model.
| Category | Typical motor range | Collet | Best beginner use | Trade-off |
|---|---|---|---|---|
| Compact/trim router | About 1 to 1.25 HP | 1/4 inch only | Roundovers, chamfers, small dados, template work | Underpowered for large bits and deep cuts |
| Mid-size combo kit | About 1.75 to 2.25 HP | 1/4 and 1/2 inch | Almost everything a hobby shop needs | Heavier, pricier, bigger footprint |
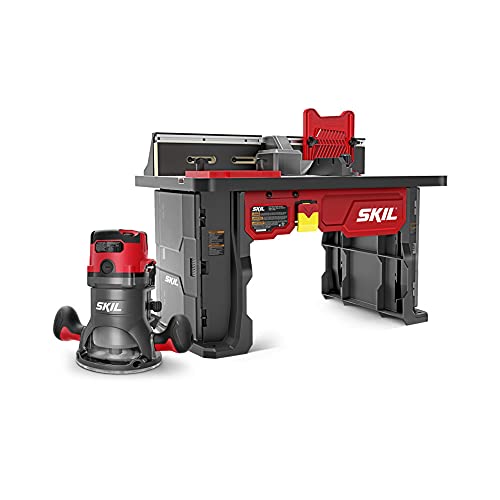
| Full-size fixed base | About 2.25 to 3+ HP | Mostly 1/2 inch | Router table duty, raised panels, big profiles | Clumsy handheld, overkill for beginners |
If you take one thing from that table, take this: the mid-size combo kit is the sweet spot for a first router, and the compact router is the sweet spot for a second one. Plenty of people do it in the other order and end up happy too. There is no wrong answer, only a different set of frustrations.
Why A Combo Kit Beats A Single Base
A combo kit is one motor with two bases: a fixed base and a plunge base. You swap the motor between them. This matters more than I expected when I bought mine.
The fixed base is what you use for edge work and, later, for mounting under a router table. Depth stays where you set it and the tool sits low and stable. The plunge base lets you start a cut in the middle of a board, which is how you do stopped dados, mortises, inlay recesses, and sign lettering. Trying to fake a plunge cut with a fixed base is possible and it is also how you get a kickback scare you will remember.
The price gap between a single fixed-base router and a full combo kit is usually modest, often in the neighborhood of a nice set of bits. Buying the two bases separately later almost always costs more than buying them together. That is the one place where the upsell is genuinely worth it.
Mid-Size Router Combo Kit (Fixed + Plunge)
This is the category I would buy again. Look for a variable-speed motor in the 1.75 to 2.25 HP range, a 1/2 inch collet included, above-table or easy-access bit changes, and micro-adjust depth on both bases. DeWalt, Bosch, Makita, and Milwaukee all sell kits in this shape and any of them will outlast a hobby shop. Compare the bit-change mechanism before you compare the price.
The Specs That Actually Matter For A Beginner
A 1/2 inch collet, not just 1/4
Half-inch shank bits flex less, chatter less, and cost roughly the same as their quarter-inch cousins. Most kits include both collets. A router that only accepts 1/4 inch shanks is fine for light work but caps what you can do later. If a kit does not clearly say it includes a 1/2 inch collet, assume it does not.
Variable speed with soft start
Large diameter bits need to spin slower or they burn the wood and scare you. Soft start keeps the router from lurching in your hands when you pull the trigger. On my first cheap router the startup torque nearly walked it off a workbench edge. Both features are standard on decent kits now, so treat their absence as a red flag.
Bit changes you can do without cursing
Some routers use two wrenches. Some use a spindle lock and one wrench. Some let you raise the collet above the table for changes when the router is mounted. If you can, put your hands on the tool in a store and pretend to change a bit. This single detail affects whether you actually use the router or leave it in the case.
Depth adjustment that stays put
Look for a coarse adjustment plus a fine micro-adjust ring, and a positive lock. Cheap routers drift under vibration, and a dado that starts at 3/8 inch deep and finishes at 7/16 inch is a visible, permanent record of your bad purchase.
Cordless or corded
If you already own a battery platform like DeWalt XR, Milwaukee FUEL, or Makita LXT, a cordless compact router is a genuine luxury for edge work and quick trims. For a first do-everything router, corded still wins on sustained power and price. My honest setup is a corded combo kit for real joinery and a cordless trim router for the ten-minute jobs.
Best Router Kit For Beginners: What To Skip
The 12-piece bit set bundled with a bargain router is usually the tell. Manufacturers pad a weak tool with cheap carbide because bits photograph well. You will get a straight bit, a roundover, a chamfer, a V-groove, and eight profiles you never use, all with thin carbide that dulls in a weekend of hardwood.
I would rather buy four good bits than twenty bad ones. Start with a 1/4 inch roundover, a 1/2 inch straight or spiral upcut, a flush trim bit with a bearing, and a 45 degree chamfer. That covers the overwhelming majority of hobby work. Add bits as projects demand them.
- ✔ Combo kits cover both edge work and plunge joinery with one motor
- ✔ Mid-size routers handle a 1/2 inch collet, which reduces chatter
- ✔ Variable speed and soft start make the first few hours far less intimidating
- ✔ A fixed base doubles as your future router table motor
- ✘ Combo kits cost more up front than a single-base router
- ✘ Mid-size routers are heavy for one-handed edge trimming
- ✘ Included bit sets are often filler and should be replaced early
- ✘ Dust collection on most handheld routers is mediocre at best
Setting Up Your First Router Without Wrecking A Board
Three habits saved me more material than any accessory. First, route in multiple shallow passes. Taking 1/16 to 1/8 inch per pass instead of full depth reduces burning, tearout, and the odds of the bit grabbing. Second, learn feed direction. Moving the router left to right along the near edge of a board keeps the bit cutting into the work rather than climbing along it. Get it backwards and the router sprints down the board on its own.
Third, always test on scrap from the same species. Maple burns where pine does not. Oak tears out where poplar behaves. Two minutes of scrap testing is cheaper than re-milling a tabletop, which I have done, on a project I had already sanded.
One more garage-specific note: routers are loud in a way drills are not, and they throw fine dust everywhere. Hearing protection and a decent respirator are not optional accessories, they are part of the purchase. If your shop shares a wall with a bedroom, plan your routing for daylight hours.
Compact Cordless Trim Router
Once you have a full-size kit, this is the tool that gets grabbed daily. One hand, no cord to drag across a finished surface, perfect for roundovers, flush trimming edge banding, and small hinge mortises. Stay on whatever battery platform you already own so you are not buying a third charger.
Accessories Worth Buying Early
An edge guide usually ships with the plunge base, so check before buying one. What is not included and matters: a set of collet-sized bushings for template work, a straightedge or track you can clamp for straight cuts, and a router pad or clamps that hold small workpieces without getting in the bit’s path. A bigger aftermarket base plate is a cheap upgrade that dramatically improves stability when routing near an edge.
Skip the router table for now. A shop-built table with your fixed base and a scrap of MDF will teach you what you actually want in a table, and it costs almost nothing. Most of the beginners I talk to who bought a nice table first ended up using it as a workbench.
| Accessory | Priority | Why |
|---|---|---|
| Extra 1/2 inch collet | High | Reduces bit chatter on larger profiles |
| Guide bushing set | High | Unlocks template and inlay work |
| Aftermarket wide base plate | Medium | Stops the router tipping on edges |
| Router table | Low | Build a shop version first |
Frequently Asked Questions
Do I need both a fixed base and a plunge base right away? You do not strictly need both, but the combo kit is where the value sits. If money is tight, a fixed base handles more beginner tasks, and a plunge base can be added later at a higher total cost. If you already know you want mortises or stopped dados, buy the combo.
Is a trim router enough for my first router? For edge profiles, flush trimming, and small dados, yes, and many hobbyists never need more. It becomes limiting when you want deep cuts, large diameter bits, or eventually a router table, because most trim routers accept only 1/4 inch shanks.
How much should I plan to spend? Prices move constantly, so I would think in tiers instead of dollars. A reputable compact router sits at the low tier, a mid-size combo kit sits a meaningful step above it, and full-size table routers sit above that. Budget separately for four quality bits, hearing protection, and a respirator, because those are part of the real cost.
My short version after years of garage projects: buy a mid-size variable-speed combo kit from a brand your local store stocks parts for, replace the bundled bits early, and spend your first weekend making roundovers on scrap until the tool stops feeling twitchy. That path costs less than my two-router learning curve did.
Check prices on Amazon →