
What's inside
- Best band saw circle cutting jigs at a glance
- Best overall: Carter Products Circle Cutting Jig
- Best for repeatable work: a dedicated miter-bar jig
- Best budget option: clamp-on circle cutting jig
- Decision matrix: which circle jig suits your shop?
- How to set up a band saw circle cutting jig accurately
- Durability, maintenance, and common mistakes
- Final recommendation
- Related Guides
As an Amazon Associate I earn from qualifying purchases. This post may contain affiliate links at no extra cost to you.
For most woodworkers, the Carter Products Circle Cutting Jig is the best ready-made band saw circle cutting jig, while a shop-made miter-bar jig is the better choice for maximum repeatability, large circles, and low cost. The right pick depends less on the brand name than on three measurements: the smallest and largest circle you need, how securely the jig mounts to your saw, and whether its pivot pin stays fixed under cutting pressure.
As an Amazon Associate we earn from qualifying purchases at no extra cost to you.
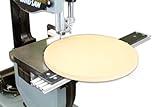

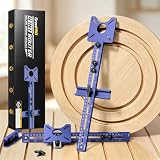

Best band saw circle cutting jigs at a glance
| Jig or design | Approximate circle range | Mounting method | Pivot-pin stability | Best for |
|---|---|---|---|---|
| Carter Products Circle Cutting Jig | About 5–48 in. diameter | Band-saw table slot or supplied mounting hardware, depending on model | Very good when tightened and aligned correctly | Frequent use and a wide range of circle sizes |
| Shop-made miter-bar jig | Typically 4–36 in.; easily extended | Dedicated miter bar in the table slot | Excellent with a metal or hardwood pivot insert | Repeatable production work and large blanks |
| Shop-made clamp-on jig | Typically 6–24 in. | F-clamps, toggle clamps, or table-edge clamps | Fair to good; depends on clamping and table thickness | Occasional use and saws without a usable miter slot |
| Short auxiliary-table jig | Typically 3–16 in. | Clamps or screws to an auxiliary table | Good for small circles if the table cannot shift | Small bowls, discs, wheels, and templates |
The ranges above are practical working ranges rather than universal limits. A jig’s actual capacity is constrained by the distance from the blade to the front and rear edges of the band-saw table, the available throat, and the size of the workpiece. Before buying, measure from the blade’s cutting line to the nearest obstruction in both directions.
Best overall: Carter Products Circle Cutting Jig
The Carter Products Circle Cutting Jig is the strongest off-the-shelf choice for a woodworker who wants a bandsaw circle jig without designing one from scratch. Its principal advantage is range: a jig capable of approximately 5- to 48-inch circles covers small turning blanks as well as furniture-scale discs and tabletops.
It is particularly useful when several people share a workshop or when circle cutting is a recurring task. The adjustable pivot position is faster to set than measuring and rebuilding a new plywood jig for every diameter. The important detail is the pivot assembly: tighten it enough that the pin cannot rotate or walk, but do not crush a soft workpiece around the hole.
This style is a good match for a conventional band saw with a sound, accurately machined miter slot. Check the mounting arrangement before ordering, because band-saw tables vary in slot width, slot position, and clearance around the blade insert.
Where it falls short
A commercial adjustable jig costs more than a basic shop-made version, generally placing it in the roughly $70–$150 market range depending on configuration and retailer. It also cannot eliminate the need for careful setup. A loose miter bar, a bent pivot pin, or a blade that is not tracking properly can still produce an oval circle.
Best for repeatable work: a dedicated miter-bar jig
A miter-bar circle cutting jig is the best technical solution when “dead true” rounds matter more than portability. The base is usually 3/4-inch plywood or phenolic sheet, with a metal or hardwood miter bar fixed beneath it. The pivot pin is installed at a measured distance from the blade, and the whole jig slides in one controlled direction.
For a circle of diameter D, set the pivot pin’s centerline D ÷ 2 from the blade’s cutting line. For example, a 20-inch circle requires a 10-inch pivot distance. Measure from the actual tooth gullets or cutting line, not from the side of the blade housing.
This design has two advantages over a clamp-on circle cutting jig for bandsaw work. First, the miter bar prevents the jig from drifting sideways. Second, the pivot can be permanently installed at a known reference point, making repeated 12-, 16-, or 24-inch circles much quicker to reproduce.
Use a steel shoulder bolt, dowel pin in a replaceable insert, or a hardened machine screw as the pivot. A plain wood screw driven into plywood is inexpensive but wears quickly and may lean under cutting pressure. For production quantities, install threaded inserts or make replaceable pivot blocks so worn holes do not ruin the entire base.
Best budget option: clamp-on circle cutting jig
A clamp-on jig is sensible if you cut circles only a few times each year, have limited storage, or own a band saw without a practical miter slot. A 3/4-inch plywood platform can be positioned parallel to the blade and secured with two clamps or toggle clamps.
The drawback is stability. Every time the clamps are removed, the jig must be realigned. Clamping close to the blade can also obstruct the workpiece, while clamping too far away allows the platform to flex. Keep the pivot pin and the blade on the same rigid section of the base, and use a second clamp near the pivot side rather than relying on one clamp at the opposite end.
For a clamp-on design, a practical limit is often about 24 inches in diameter. Larger workpieces create more leverage and can rotate the jig or pull it away from the blade. If you need larger rounds regularly, a miter-bar design is the safer and more repeatable upgrade.
Decision matrix: which circle jig suits your shop?
| Your situation | Best choice | Why |
|---|---|---|
| Budget under $40 and occasional use | Shop-made clamp-on jig | Uses plywood, a clamp, and a replaceable pivot pin |
| Weekly circle cutting | Commercial adjustable jig or dedicated miter-bar jig | Faster setup and less alignment drift |
| Large circles over 30 inches | Long miter-bar jig | Better resistance to twisting and table-edge leverage |
| No usable miter slot | Clamp-on or auxiliary-table jig | Does not depend on slot dimensions |
| Small circles under 6 inches | Short auxiliary-table jig | Keeps the pivot close to the blade and reduces flex |
| Many identical parts | Miter-bar jig with fixed pivot locations | Fast, repeatable positioning for batch work |
How to set up a band saw circle cutting jig accurately
- Choose the blade first. Use a sharp, properly tensioned blade suited to the material. A blade that wanders cannot be corrected by a jig.
- Mark the cutting line. Locate the blade’s actual tooth path with the saw running and power disconnected before making measurements or adjustments.
- Calculate the pivot distance. Divide the desired circle diameter by two. Add no extra distance unless the jig’s instructions specify a different reference point.
- Align the jig parallel to the blade. Slide the base forward and backward without contacting the teeth. The pivot track should remain square to the blade’s cutting direction.
- Secure the pivot. The pin should stand perpendicular to the table. Test it by applying sideways pressure with a scrap block; any visible movement will become an inaccurate radius.
- Start with a relief cut. Cut from the edge of the blank toward the marked circle, stopping at the circumference. This removes waste and prevents the blade from binding during the rotation.
- Rotate slowly and continuously. Keep the workpiece seated on the table and feed at a rate that does not force the blade sideways.
For a 20-inch circle cut from a 22-inch square blank, the jig must hold the pivot 10 inches from the blade. If the pivot hole is 1/16 inch off position, the radius can be off by the same amount; at opposite points on the circle, that can appear as up to 1/8 inch of total diameter error. This is why a rigid pivot insert matters more than decorative features on the jig.
Durability, maintenance, and common mistakes
The first parts to wear are usually the pivot hole, the miter-bar fasteners, and the underside of a plywood base that drags over the saw table. Replace a loose pivot insert rather than enlarging the hole and accepting a sloppy fit. Wax the miter bar lightly, but keep wax and sawdust away from the blade and workpiece contact surfaces.
Clean the jig after each project. Fine dust can pack around the pivot and subtly raise the workpiece, changing the radius. Check that clamps have not dented the base, and confirm that the pin remains square after transporting the jig.
The most common mistake is setting the pivot distance from the blade body instead of the cutting line. Other frequent errors include using a dull blade, rotating the blank too quickly, failing to make a relief cut, and allowing the workpiece to lift while it turns. A circle cutting jig bandsaw setup is only as accurate as its blade tracking, pivot, and reference measurements.
Final recommendation
Choose the Carter Products Circle Cutting Jig if you want broad size coverage and a ready-made solution for regular workshop use. Choose a dedicated miter-bar jig if repeatability, large diameters, or batch production are priorities. Choose a clamp-on jig for occasional projects and low cost, provided you keep the circle size modest and verify the clamps cannot move.
Whichever circle cutting jig for bandsaw work you select, prioritize a rigid base, a perpendicular pivot pin, and a mounting system that cannot shift. Those three details determine whether the finished round is merely recognizable as a circle or is accurate enough for joinery, templates, wheels, and production parts.